- Engineering
- Measuring systems
- Machine qualification
-
Components
-
Systems
-
Learn more
-
- Expertise
- About IBS

Explore real-world applications of non-contact sensor technologies, highlighting the performance and precision of capacitive and inductive systems. These case studies detail how these sensors address complex measurement challenges across various industries, providing reliable and accurate solutions in demanding environments.
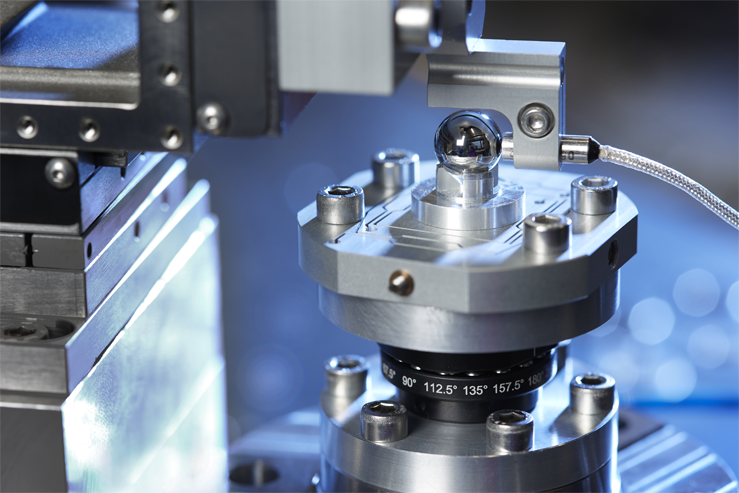
For a rotational stage calibration an artefact was required in the form of a ball with a maximum roundness error of 25nm. To qualify these balls a stage was made including an air spindle and rotary encoder. Using a capacitive sensors with sub-nanometer accuracy and our spindle error software, in combination with the Donaldson reversal technique, we could successfully qualify these artefacts.

An integrated probe system was developed for stage focusing. A tailored probe design with 45° surface was required to fit the available space; the probe was encapsulated to improve reliability and prevent charging issues. The probe was optimised to allow on/off switching within 1 ms. A dual range option was offered for high precision focus measurement with sub-nm accuracy. The system was supplied for a UHV environment with vacuum feed through.

A multichannel system was required for the machine tool sector to determine critical performance parameters including radial and axial error motions, thermal drift and distortion due to environmental vibrations. Hardware developed can be synchronised with customer encoders or index pulses and employs an integrated temperature module. The system offers a dual range option for either standard or ultra-precision machines. Integrated data acquisition is employed for the highest accuracy, undisturbed by electrical influences.

In production (100%) measurement of disk drive writing heads was required to minimise run out. Reducing this enables smaller track widths to be written and higher storage densities to be achieved. Extremely high resolution (sub-nanometre) was needed on very small targets (smallest target 0,2 mm). A tailored probe design was applied with a sensing area very close to the edge of a flat probe; a fork design was used to enable measurement of difficult to access locations. Eurocard design was realised for easy integration into the customer electronics.

In production a 100% measurement of bearing shell thickness was required. Measurement was to be carried out in the feeder resulting in a large variation in the position to the probe. This required a large stand-off and probe range, while maintaining sub-micron accuracy. The CPL350 system probes were calibrated against the convex/concave surface to eliminate linearity error caused by the small bearing shell radius. In a subsequent application, a CPL230 was implemented for up to 6 channels per machine to measure eccentricity. Synchronisation was applied to avoid cross talk.

The application required a stage to be moved with high accuracy in six degrees of freedom. The CPL590 was chosen as this fully digital measurement system could be directly integrated into the ethercat control loop under development. Six channels were synchronised to each other. This combined with the high resolution and bandwidth enabled successful delivery of a ground breaking precision machine.

Satellites in low earth orbit are in continuous and high-speed motion. Onboard sensors must be capable of detecting the satellite’s mirror position at a nanometer scale to direct the information correctly and precisely. The systems must survive harsh conditions on the satellite’s surface; where temperatures vary greatly and steering mirrors operate in a vacuum environment. Based on these market needs, the EDA400 system was designed. It includes two pairs of sensors (for the X and Y axes) and the driver unit. The system features ultra-high bandwidth, nanometer resolution, digital/analog signal output, low power consumption, and very low outgas- sing compatible with vacuum conditions. Can be made to order.

A contactless, wireless solution was developed for in vacuo real time control of the short stroke of a magnetically levitated precision stage. A set of synchronised probes were used to measure the z-height and two rotations out of plane. 2kHz bandwidths were achieved with deterministic data transmission at latency figures of 300us; sufficient for real time positioning control. Packet loss rates of 1.1e-7 were also realised to ensure reliability.

The customer required high accuracy spindle measurement capability integrated directly into their spindle. We designed an industrial solution accommodating the limited available volume, offering high performance within the demanding high temperature and pressure environment.

24 sensors were integrated into a machine tool bed to enable real time measurement of thermal and work piece related deformations. Probes with long cables were employed to ease integration and provide a cost effective smart metrology solution.

The customer required to measure the surface oxide layer thickness of nuclear fuel rods. This thickness is used to confirm the remaining lifetime of the rod, optimising the economic performance of the fuel. As it also see flaws in the oxide layer, it is used for root cause analysis of failed fuel rods and to confirm fuel behaviour models.

While conventional sensors have trouble detecting the presence of threads, the ECA101 can easily detect the difference between a tapped and untapped hole. With an unthreaded hole, the signal is altered, with comparison to a threaded hole. As a distance sensor, thread pitch can be detected.

Ultra precision probes were implemented under water to detect vibration and/or motion of moving surfaces on sea-going vessels (propellers, rudders...). The combination of high bandwidth and extreme precision offered by the ECL101 was perfect for the challenge.
